Backing up your WordPress site creates a secure restore point before performing major updates or troubleshooting inside Elementor. You can back up your site automatically using built-in Elementor Host tools, generate a server archive via cPanel if your site is hosted elsewhere, or install a trusted WordPress backup plugin.
How do you back up an Elementor Host website?
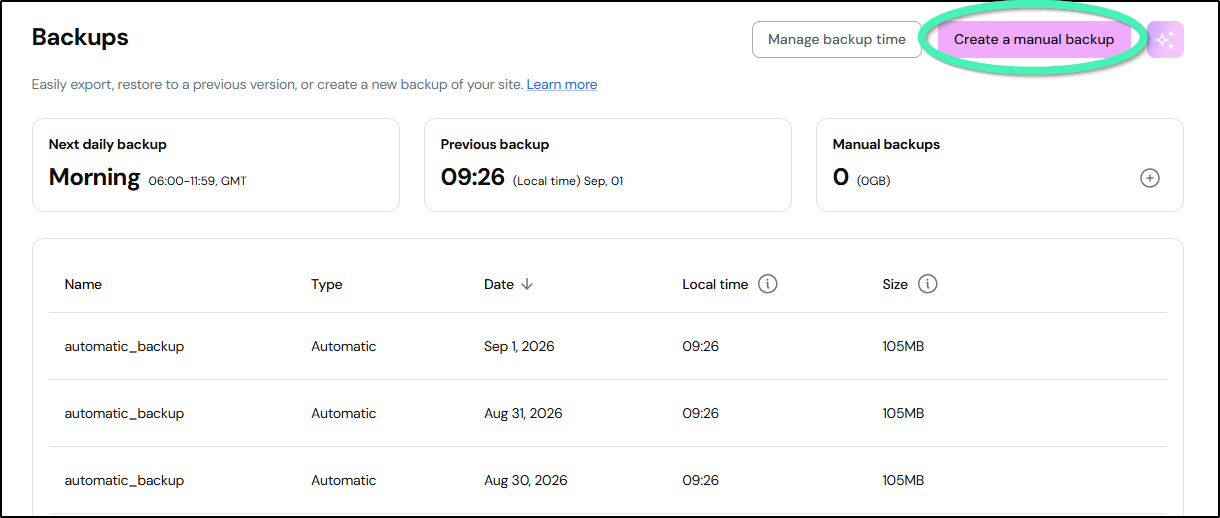
Elementor Host includes daily automated backups and 1-click manual backups managed directly in your account dashboard. For more information, see How to Back Up Your Elementor Host Site.
- Log into My Elementor: Go to My Elementor Dashboard and select your website card under Sites.
- Open Backups Panel: Click the Backups tab from the side panel.

- Create Manual Backup: Click Create a Manual Backup, enter a descriptive label (such as Pre-troubleshooting backup), and click Create.
How do you back up a WordPress site using cPanel?
If your WordPress website is hosted on a third-party hosting provider running cPanel (rather than Elementor Host), generate a complete site backup archive directly from your server management panel:
- Access cPanel: Log into your third-party web hosting account and launch the control panel dashboard.
- Navigate to Files: Locate the Files section and click Download a Full Account Backup (or Backup Wizard).
- Configure Backup Destination: Set the Backup Destination dropdown to Home Directory and enter your email address to receive a completion alert.
- Generate Backup: Click Generate Backup to initiate the server export process. Leave cPanel open.
- Download Archive: Upon receiving the confirmation email, return to cPanel, click Download a Full Account Backup, and select the generated
.tar.gzor.zipbackup file to save it to your local system.
How do you back up WordPress using a plugin?
If you do not have cPanel access or are not using Elementor Host, install a dedicated backup plugin from the WordPress repository:
- Navigate to Plugins: Go to Plugins > Add Plugin in your WP Admin dashboard.
- Search Directory: Search for reputable backup plugins
- Install & Activate: Click Install Now next to your chosen plugin, then click Activate.
- Run Backup: Follow the plugin’s setup wizard to trigger an immediate backup containing both your MySQL database and the
/wp-content/directory.
For more information about finding and installing WordPress plugins, see Install WordPress plugins.
Remote Storage: Configure plugin settings to send automated backups to external cloud storage providers (such as Google Drive, Dropbox, or Amazon S3) rather than storing them exclusively on your web server.