Confused? What do you do first?
Follow troubleshooting steps to
do the job right!
Troubleshooting Steps
1. Verify
2. Analyze
3. Isolate
4. Repair
5. Ops check
Step 1: VERIFY
IS THERE ACTUALLY A PROBLEM ?
The problem might be simpler or
more complicated than it looks.
Hey, it won’t work!
and trying harder
just makes it worse!
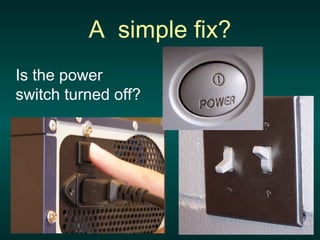
A simple fix?
Is the power
switch turned off?
Is it just unplugged?
Is it disconnected at the
power source?
Is the circuit
breaker off?
See the tripped
one?
Step 1: VERIFY
• Is there really a problem?
• Is the power switch turned off?
• Is it just unplugged?
• Has it been disconnected?
• Is it getting power?
• Do you know how it is supposed to
work?
Step 2: ANALYZE
• THINK !THINK !
• What should be happening that isn’t or
what is happening that shouldn’t?
• What could be the cause of the problem?
• Which part is most likely the cause of the
trouble?
• Are there other things that might have an
effect?
• Is it mechanical or electrical or electronic?
Step 2: ANALYZE
• What is the most logical cause of the
problem?
• Suspect the simplest thing first.
• Work toward more complicated things.
Step 2: ANALYZE
• Do you know the circuit?
• How many things can go wrong?
• Identify components most likely to fail.
Step 3: ISOLATE
• Look for damage (broken wires, cracked foil
traces, burned components, cold solder
joints).
• Check each part, starting with the simplest.
• Check one thing at a time
• Check components with a good meter.
• Trace continuity with an Ohm meter.
• Remember one handed meter readings if
circuits are powered.
Step 4: Repair
Repair or Replace?
Is it more cost
effective to replace
a part or machine
or to repair?
Step 5 Ops Check
• Does it work?
• Double check to make sure it is
operational again.
• Reassemble it all back together again
after you ops check.
• Ops check again after reassembly!
• Your job isn’t done unless you make sure
it works!
Review
1. VERIFY – is it broken?
2. ANALYZE – how does it work?
3. ISOLATE – which part is broken?
4. REPAIR – fix or replace
5. OPS CHECK – test drive it
Follow the steps for success.
Recite the Five
steps !
• Makes troubleshooting easier
• Set up a bench with all working parts.
• Swap out working parts with parts that need
troubleshooting and repair.
• Swap out and test one part at a time.
The Test Bench
stereo
tuner
TV
speakers
VCR
computer
printer
monitor
scanner
camera
DVD
bad ?
When you receive a part that is
not working
• Label it with:
– who owns it or brought it in
– the date it was brought in or reported
– the reported or suspected problem
– who is responsible to troubleshoot and repair it
• Put it in the test bench queue.