Pattern creation basics in Logic Pro for iPad
Using Step Sequencer in Logic Pro for iPad, you can create rhythm-based drum patterns and note-based instrument patterns using software instruments. You can start with an empty pattern or use an existing pattern or template as a starting point.
You create a pattern by turning steps on and off, modifying steps using edit modes, and editing aspects of the overall pattern, including the pattern length, the step rate for the pattern, and the pattern pitch source. You can increase the number of notes or drum sounds in a pattern by adding rows and choosing the row assignment. When you activate Learn mode, you can quickly add rows by playing notes or manipulating automation parameters. You can also add your own samples using drag and drop.
Create an empty pattern region in the Tracks area
In Logic Pro, tap an empty software instrument track, then tap Create Pattern Region.
Create an empty pattern cell in the Live Loops grid
In Logic Pro, tap an empty software instrument cell, then tap Create Pattern Cell.
Open Step Sequencer
Tap a pattern region, then tap the Editors button
 in the middle of the view control bar to display that region in Step Sequencer in the Editors area.
Turn steps on or off
In Logic Pro, tap the Step On/Off button
 in the Step Sequencer menu bar, then tap an inactive step in the grid to turn it on.
Tap an active step to turn it off.
Enter steps monophonically
Using Mono mode, you can easily create monophonic lines by suppressing the creation of more than one note per step position. When you turn on a step, and another step is already active at the same vertical position, the previously active step is turned off. This can be useful, for example, when creating patterns for a monophonic instrument.
Turning on Mono mode does not turn off steps that are already active, but once you activate a new step, Step Sequencer turns off all other active steps at the same vertical step position.
To turn on Mono mode, tap the Mono Mode button
 in the Step Sequencer menu bar.
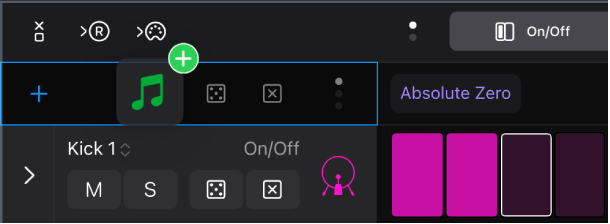
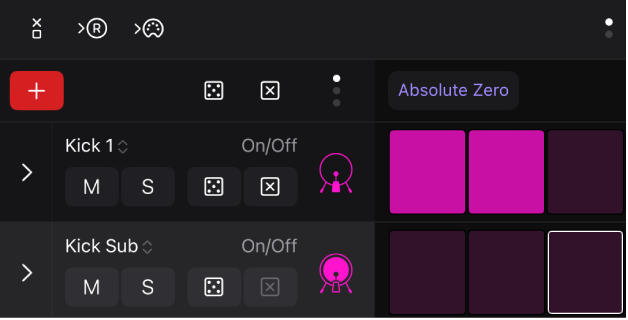
Add a row
You can add a row and choose the kit piece (for kit piece rows), pitch or chord degree (for note rows), or automation parameter (for automation rows) directly using the Add Row button. You can also add rows using Learn mode.
Next to the pattern controls in Logic Pro, tap the Add Row button
 , then do one of the following:
To add a kit piece row: Choose Kit Pieces, then choose a kit piece from the submenu.
To add a note row: Choose Notes or Chord Degrees, then do one of the following:
Choose a fixed pitch, chord degree, or a drum sound for the row from the submenu.
Choose Melodic if you plan to add a note row with steps set to different pitches.
To add an automation row: Choose Automation, then choose the automation parameter for the row from one of the submenus.
To activate Learn mode: Choose Learn (Add) or Learn (Assign).
After adding a row, you can turn steps on or off and edit other settings using edit modes.
Add a sound from the Browser
When you have pattern regions on a track that uses Drum Machine Designer, you can quickly add sounds, such as a kit piece, loop, or sample, from the Browser to Step Sequencer.
In the Browser in Logic Pro, touch and hold a kit piece or sample, then drag it to the area above the row headers in Step Sequencer.
A new row is created with the sound.
Add your own samples or audio files
You can quickly add your own samples or audio files to Step Sequencer from the Files app.
In Logic Pro, do one of the following:
At the top level of the Browser, tap Sample Folders, then navigate to the folder containing the samples you want to add. To add your own samples to the Browser, see Add your own sample folders to the Browser.
Using Windowed Apps on your iPad, open Logic Pro and the Files app side by side. See Turn Windowed Apps on or off on your iPad.
In the Files App window, touch and hold the sample you want to import until it appears to lift off the screen slightly. To select multiple samples, touch and hold one, drag it slightly, then continue to hold it while you tap additional samples with another finger. A badge indicates the number of selected items.
Drag one or multiple samples from the Files app to the area above the row headers in Step Sequencer.
A new row is created for each sample.
Add multiple note rows
You can simultaneously add multiple note rows within a specified range. A row is added for each note in the range of the pattern’s key and scale.
Next to the pattern controls in Logic Pro, tap the Add Row button
, tap Notes, then tap Range.Set the range for the note rows you want to add by choosing a low note and a high note, then tap Create.
Add rows using Learn (Add) mode
You can add rows by playing MIDI notes or manipulating automatable parameters using Learn mode. When Learn (Add) mode is active, Step Sequencer creates a new note row for any played MIDI note or parameter for which a row does not already exist. Similarly, it creates a new automation row for any received parameter controller event for which a row does not exist. Learn (Add) mode simplifies the process of creating a step grid with the notes, drum sounds, and automation parameters you want to use in your pattern.
To activate Learn (Add) mode, tap the Add Row button
, then tap Learn (Add).While Learn (Add) mode is active, the Add Row button is red.
Do either of the following:
To add note rows: Play notes on a Play Surface in Logic Pro or a connected MIDI keyboard or other MIDI controller.
To add automation rows: Manipulate a control for an automatable parameter (such as a plug-in parameter), either in Logic Pro or using a connected MIDI controller.
To turn off Learn (Add) mode, tap the Add Row button.
After adding a row, you can turn steps on or off and edit other settings using edit modes.
Reassign rows using Learn (Assign) mode
You can reassign existing rows by playing MIDI notes or manipulating automatable parameters using Learn (Assign) mode. When Learn (Assign) mode is active, Step Sequencer reassigns the selected row to match any played MIDI note for which a row does not already exist, or to match any received parameter controller event for which a row does not exist.
To activate Learn (Assign) mode, tap the Add Row button
, then tap Learn (Assign).While Learn (Assign) mode is active, the Add Row button is yellow.

Tap the icon of the row you want to reassign.
Do either of the following:
To reassign a note row: Play notes on a Play Surface in Logic Pro or on a connected MIDI keyboard or MIDI controller.
To reassign an automation row: Manipulate a control for an automatable parameter (such as a plug-in parameter), either in Logic Pro or using a connected MIDI controller.
To turn off Learn (Assign) mode, tap the Add Row button.
After adding a row, you can turn steps on or off and edit other settings using edit modes.
Step Sequencer provides many controls and functions for working with patterns. You can modify pattern playback; edit steps and rows; randomize steps; follow the Chord track or region chords; and edit pattern, row, and step settings in the inspector. You can also customize different aspects of Step Sequencer to suit your workflow. See Customize the Step Sequencer interface.
Download this guide: PDF