

Google Sheets Integration: The Best Way to Create Spreadsheets
Google Sheets Integration: Use Google Sheets to create and edit online spreadsheets. Get insights together with secure sharing in real-time and from any device.
Bit Form is a WordPress form builder plugin that can integrate with over 50+ popular platforms, including Zoho CRM, Zoho Sheet, Zoho Campaign, ActiveCampaign, Airtable, Agiled CRM, Dropbox, Copper CRM, Capsule CRM, HubSpot, Groundhogg, Google Drive, Google Sheet, Zoom, Zoho Recruit, Zoho Desk, Zoho Bigin, WooCommerce, WebHooks, Trello, Telegram, SendFox, Propovoice CRM, Moosend, and MailPoet. This can help you save time and effort, and improve your lead generation and customer management processes.
Google Sheets Integration Tutorial
Authorization of Google Sheets Integration
To set up the Google Sheets integration in Bit Form, simply go to the Bit Form plugin and open up the form you want to work on. Then, head to the form settings and look for the integrations section. Click on the plus icon to add a new integration, and search for Google Sheets from the available options.
Integration Name/Title: Here give the meaningful integration title as per your requirement.

Generate Google Sheets Client ID and Client Secret
To get your Google Sheets Client ID and Client Secret, follow these steps:
- Go to Google Cloud Console
- Open the Google Cloud Console and sign in with your Google account.
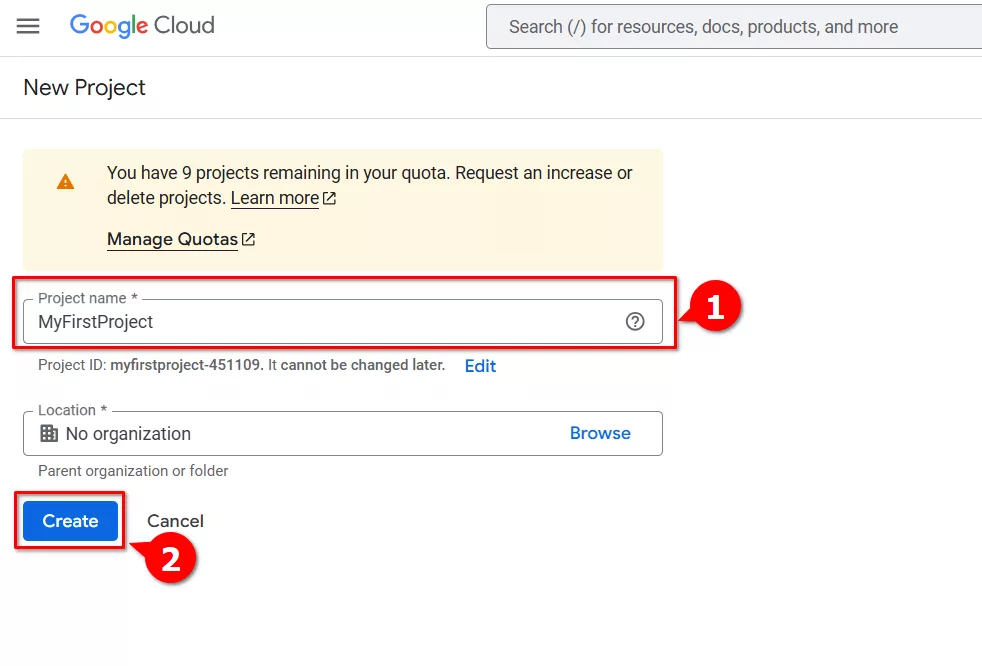
- Create a Project or Select an Existing Project
- If you don’t already have a project, click on Create Project and follow the prompts to set it up.
- If you have an existing project, select it from the project list.

- Enable APIs:
3. Configure Consent Screen:
- Go to “Configure Consent Screen.”
- Click on “Get Started” under OAuth Overview.
- Fill in App Information, Audience, Contact Information, and click Finish.
- Click Create.
- Publish the App.
- On the left menu, click Audience and Publish the app.
- Create a Client.
- On the left menu, go to Clients and click “CREATE CLIENT.”
- Select Web Application as the application type.
- Enter a Name.
- Add your Authorized JavaScript Origins and Authorized Redirect URIs (found on the integration page).
- Enable Data Access.
- In the scope section, click on “Add or Remove Scopes.” Add these scopes. Then, click on “Update.”
- https://www.googleapis.com/auth/drive
- https://www.googleapis.com/auth/drive.file
- https://www.googleapis.com/auth/drive.metadata
- https://www.googleapis.com/auth/spreadsheets
- https://www.googleapis.com/auth/userinfo.profile
- https://www.googleapis.com/auth/userinfo.email
- Scroll down and click Save.
- In the scope section, click on “Add or Remove Scopes.” Add these scopes. Then, click on “Update.”
 Note
Note
While adding scopes, you may see some restricted scopes. Your integration will still work after adding them, but if you encounter any errors, you will need to verify the app. To do this, go to the Verification Center on the left side and complete the verification process.
Learn more: Google Cloud App Verification
4. Generate Client ID and Client Secret:
- Go to the “Credentials” section.
- Click on the download icon under the Action column.
- A popup will appear displaying your Client ID and Client Secret.
- Copy these credentials.
- Paste them into the appropriate fields on the integration page.

Once you have successfully entered your Google Sheets Client ID and Client Secret, click “Authorize” to proceed. Then click Next.

Spreadsheets: Select a Spreadsheet from the drop-down option.

Worksheet: Select a Worksheet from the drop-down option.

Header Row: Specify your header row, for instance, A1.

In the integration settings, you will see a “Map Fields” option. This is where you will need to map the fields from your form to the corresponding fields in Google Sheets. You have the option to map additional fields by clicking on the Plus (+) icon.

Once you have configured the desired settings for the integration, click the Save & Finish button to save the integration.


Configuring the conditional logic
Now, let’s set up some conditional logic to trigger the integration for the submitted data. To do this, head over to the conditional logic section. You have the option to create a new conditional logic or use an existing one. Make sure to set the Action behavior to “Always” and check the Integration under Additional Actions. Then, select your desired Integration, in this case, “Google Sheets“. Once done, just click on Update.
Every integration has a timeline that you can use to check the success or error status of the integration. To see your response, just head over to the Response section in Bit Form, click on your record, and then scroll down. Below your Timeline, click on Show Integration Logs.


Troubleshooting Request had invalid authentication credentials Error
Troubleshooting Request had invalid authentication credentials Error
Error Description
“error”:{“code”:401,”message”:”Request had invalid authentication credentials. Expected OAuth 2 access token, login cookie or other valid authentication credential. See https://developers.google.com/identity/sign-in/web/devconsole-project.”,”status”:”UNAUTHENTICATED”}}
If you are facing the above Google token expiration issues, our developers contacted Google support and received the following guidance:
Welcome to the Google Cloud Community!
You are correct that once the Publishing status is set to “In Production,” tokens shouldn’t expire after 7 days. Please try the following steps from this Stack Overflow thread[1]:
- Go to https://console.cloud.google.com/apis/credentials/consent and change the status from “Testing” to “Published.”
- Delete the current token file.
- Authorize the API again by signing into your Gmail account. You will encounter a warning screen; choose to proceed.
- Once done, you will receive a new token file.
If these steps do not resolve the issue, you can contact Google Cloud Support for further assistance. Thank you!

