
BetterDocs offers complete compatibility with the most popular WordPress Multilingual Translation Plugin, WPML. It allows you to translate single documents of BetterDocs into any language you want and use them on your multi-language website.Â
Letâs follow the step-by-step guidelines to translate single docs with WPML below:
How to Configure WPML Plugin Settings #
To translate single docs of BetterDocs with WPML, make sure that you have installed & activated the following plugins on your WordPress site:
WPML Multilingual CMS y WPML String Translation. For more information, you can check out this WPML doc to configure it on your WordPress site.

After installing these plugins, go to âWPMLâ â âSetupâ from the dashboard and select your default language and the language you want to translate your single docs to. You can change it later anytime.
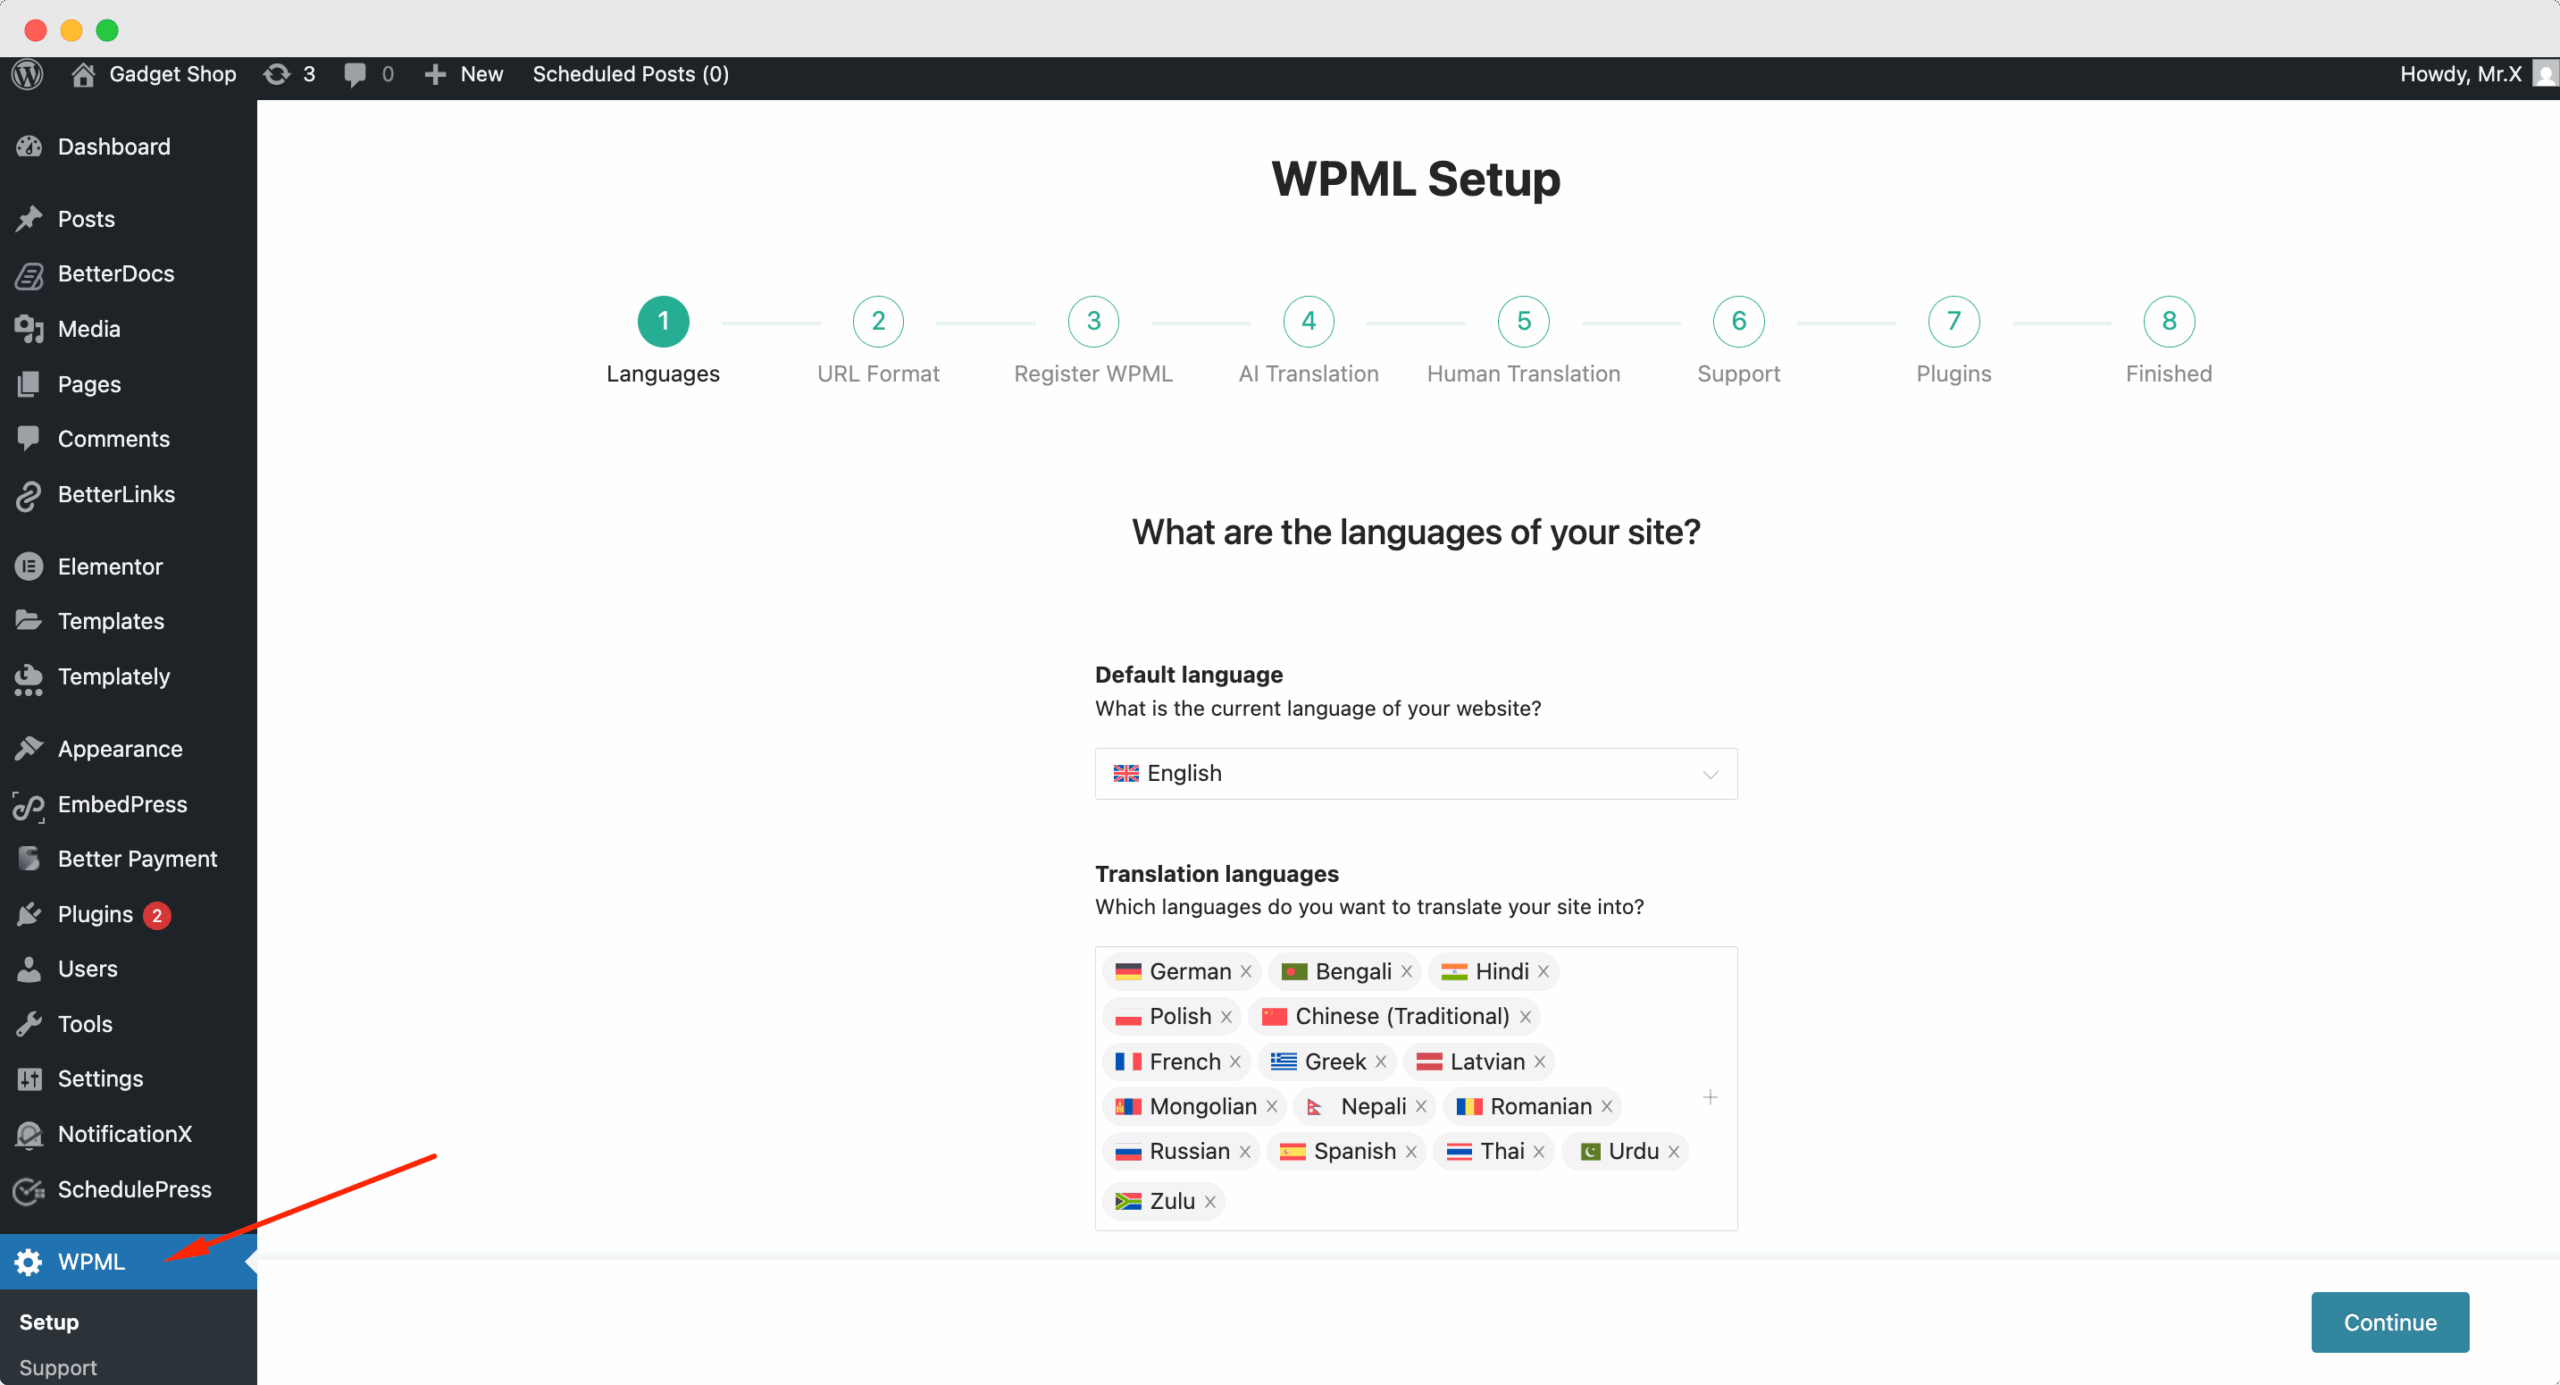
In the following âURL Formatâ step, select how you would like to format the URL. These are your options for formatting:
- different languages in directories
- a different domain per languageÂ
- Language name added as a parameter.
Once done, click âContinue.â

Next step is to âRegister WPML.â Add your site key in its designated field. Refer to the image below. Once done, click âContinue.â

Then we set up âAI translation.â The AI understands Context and the Target Audience. Input relevant information regarding the following:
- The name of your product/service/website
- Describe what your website is about [briefly]
- Target Audience [e.g., GenZ]
Once done, click âContinue.â
Note: WPMLâs AI translation is powered by Private Translation Cloud (PTC). It is accessible from the dashboard, WPML â Settings.Â

Now, in the fifth step, we set up âHuman Translationâ también.
You have three options through which human translations can be made:
- âOnly myselfâ to translate solely by yourself
- âA Translation Managerâ who will have access to set up the translators for your siteÂ
- âTranslation Contributorsâ, the site admin can assign Contributors directly.
After choosing your method, click âContinueâ.

This next step asks you about preferences regarding âSupportâ and usage data.Â
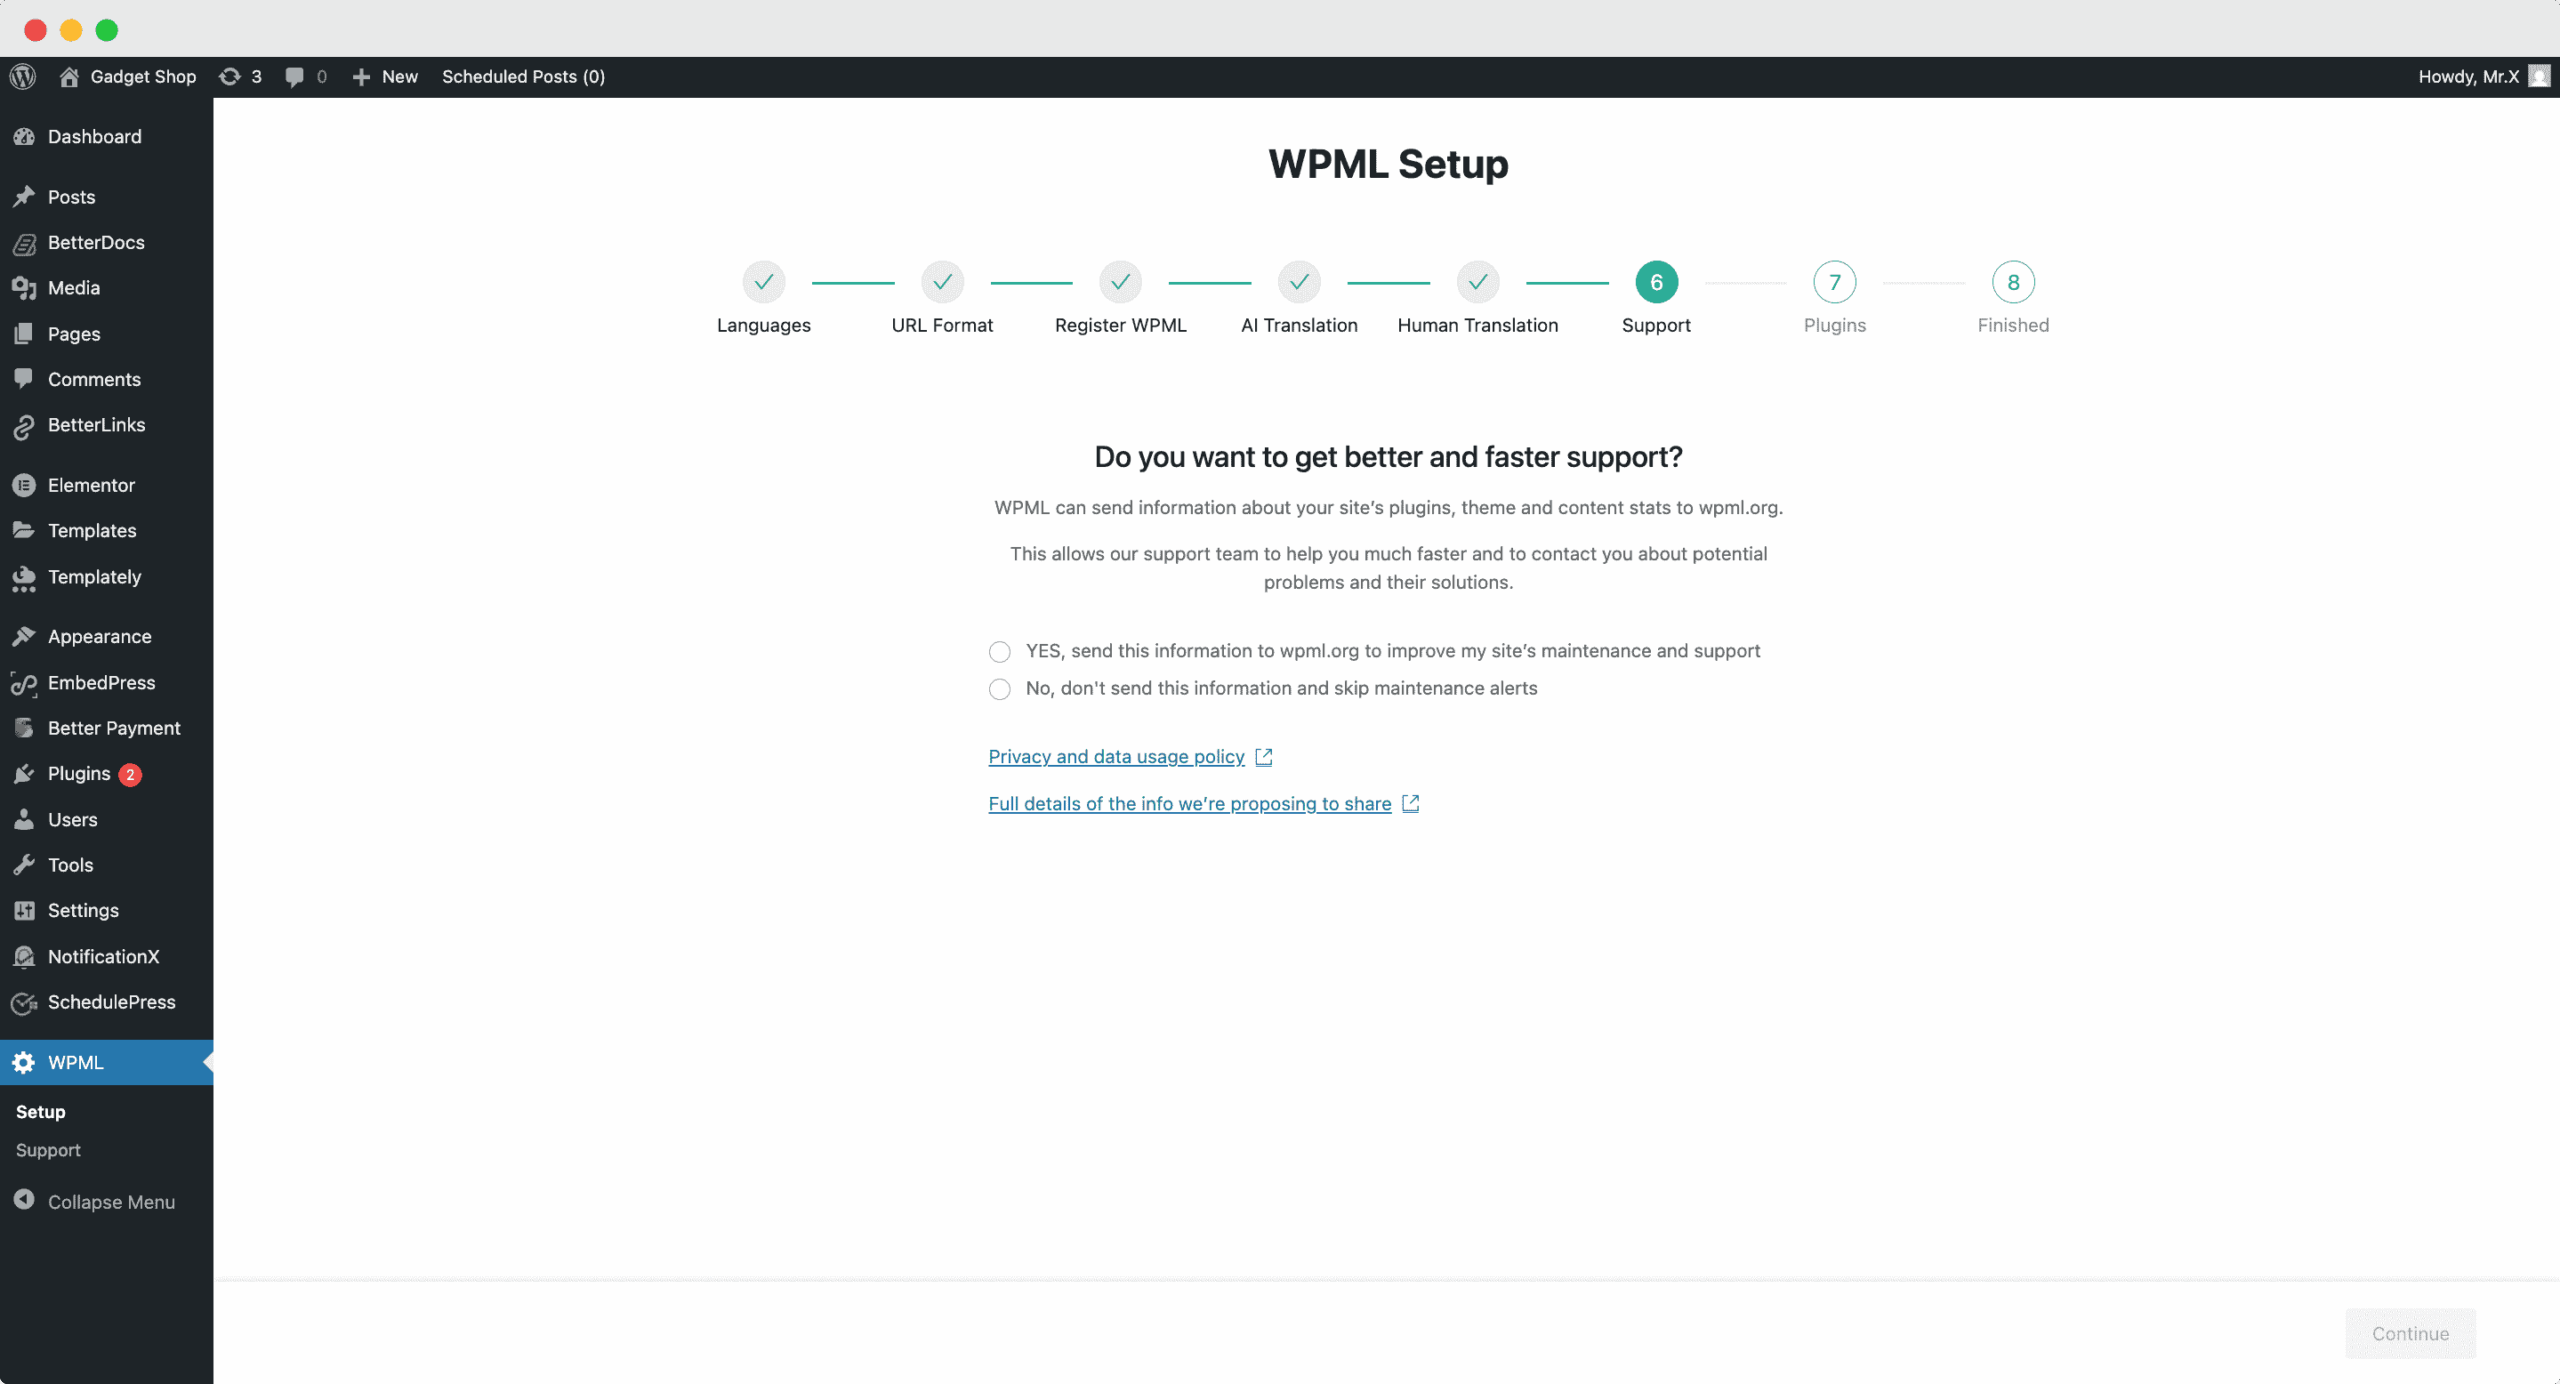
In the last two onboarding steps, the WPML plugin will be ready for use on your WordPress website.

How to Translate Documents Automatically #
Exit the Setup Wizard. Go to WPML â Translation Dashboard. Here, you can enable translation for single docs by toggling them on.

Once you have selected the docs you want to translate, click âTranslate your content.â The next step asks you about your publishing and review preferences.
Upon translation, you can do one of the following:
- Publish without review (your translations publish without any further review)
- Wait for review (you can use external resources to review)
- Publish and mark for review (you can publish and review later by yourself)
After that, all the selected documents will be translated automatically.

How to Translate Documents Manually? #
Now, to manually translate your docs, go to your dedicated doc editor. Scroll to the bottom. Click on the gear icon next to the language you want to translate to. It will take you to the Translation Editor.

From there, you can input the relevant information relating to your doc. Once done, click âSave and Complete.â

Resultado final #
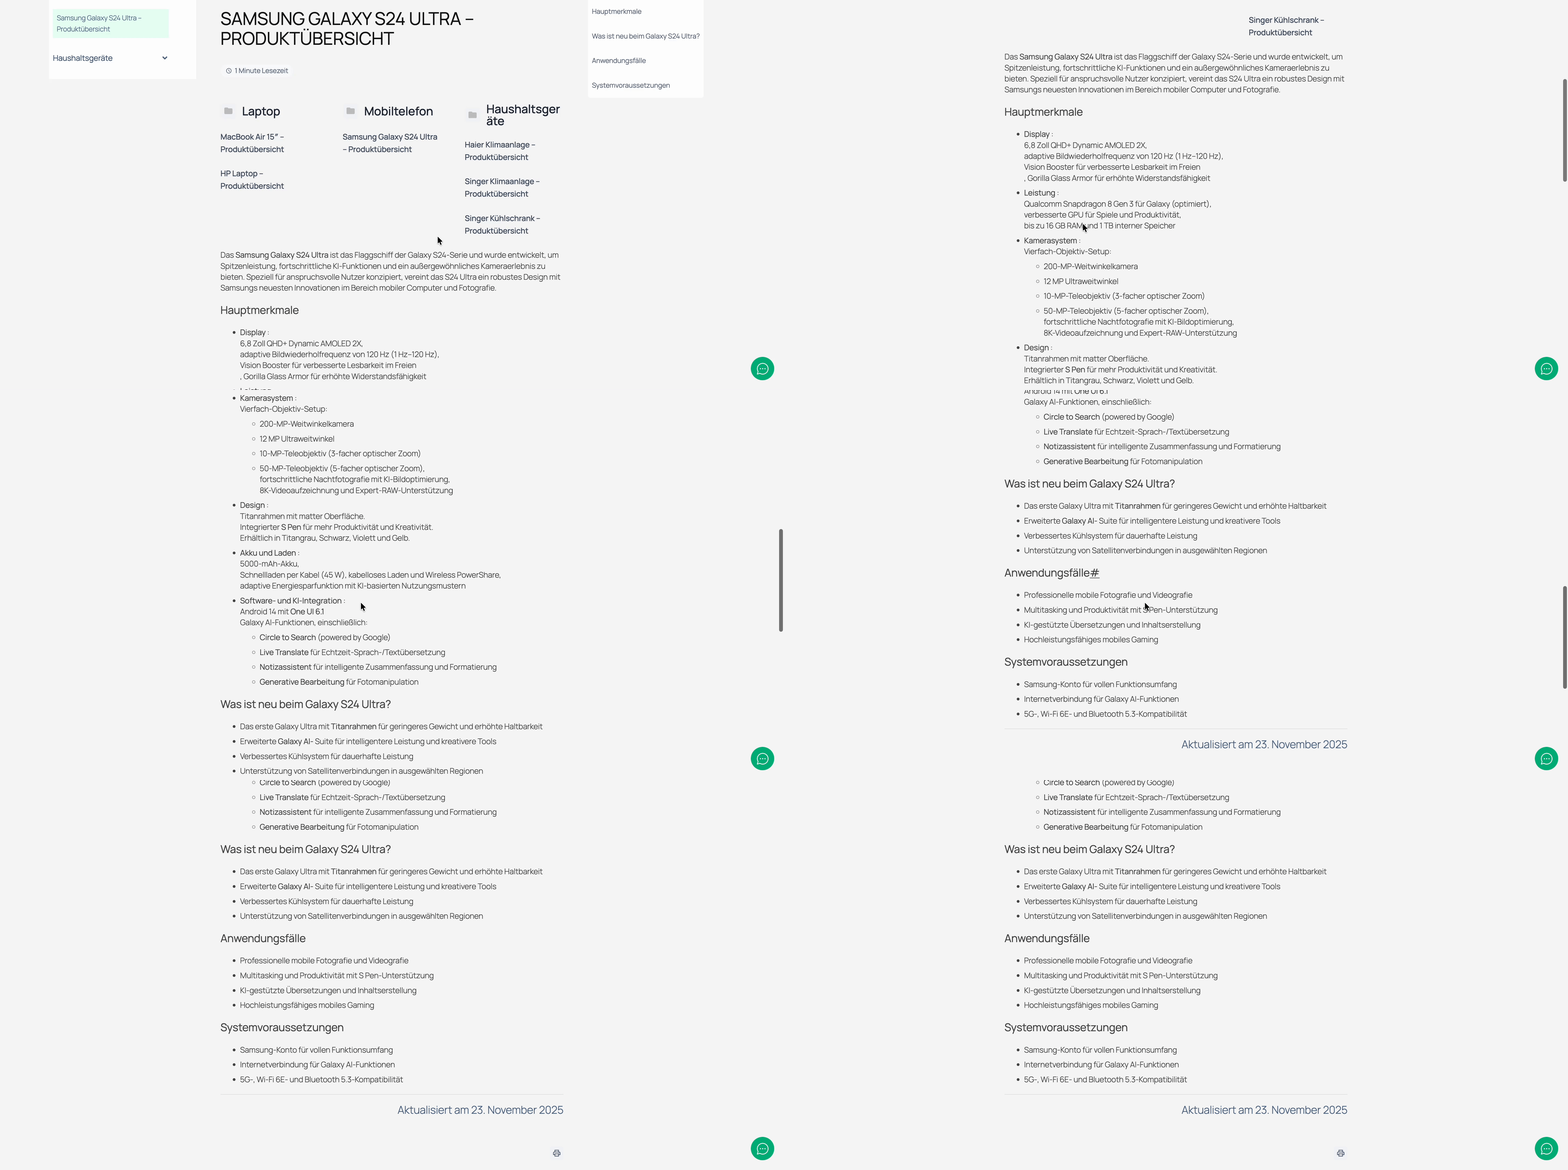
By following these simple steps, you can see the successful translation of your preferred BetterDocs single docs using WPML.
¿Quedarse atascado? No dude en contactar a nuestro dedicated support team for any further assistance.


